Call Static Blocks From Any PHTML File in Magento

Wednesday, December 14, 2011
In this article i am going to show you...How to call a static block from any template(.phtml) file in Magento.You can easily call any static block from template (phtml) file. At first, you have to create a static block from admin, CMS->Static Blocks .
Let us suppose, you created a static block with the identifier footer_links.
Now, you can call the static block from any phtml file with the help of following code:
<?php echo $this->getLayout()->createBlock('cms/block')
->setBlockId('footer_links')->toHTML();?>

Use any SMTP to send mail in Magento

Sunday, December 11, 2011
This article will explain how to create an extension to send all the emails through gmail or other servers.I have created an module to set up an email account from admin.
I have made use of "Zend_Mail_Transport_Smtp" class to make it possible.

Magento Files and Folders Structure

Friday, December 9, 2011
This part of the Magento tutorial will provide detailed information regarding the Magento's default files and folders structure.
You will learn more about the functions of main files and folders included in the Magento package.
The files and folders included in the main directory are as follows:
• .htaccess - contains mod_rewrite rules, which are essential for the Search Engine Friendly URLs. There you can also find standard web server and php directives that can improve your web site performance.
• .htaccess.sample - this is a backup of the .htaccess file. If you modify .htaccess it can be used in order to get the default settings.
• 404 (directory) - The folder stores the default 404 template and skin for Magento.
• app (directory) - This folder contains the modules, themes, configuration and translation files. Also there are the template files for the default administration
theme and the installation.

Common issues with importing/exporting

You can import/export data by using megento inbuilt import/export feature.
Go to System->Import/Export->Dataflow-Profiles. However, during the import and the export procedures different issues can occur.
The most common ones are as follows:
• Incorrect CSV file formatting - A bad formatting of a CSV file can cause a failed data import or missing rows after the import. The issue occurs more often with CSV files that with MS Excel since CSV is more prone to data failures due to a bad formatting.

Magento Transfer From One Server To Another

This tutorial provides detailed information how to move a Magento store from one host to another (or to a different hosting account).
MySQL database backup:-
PhpMyAdmin included by default in cPanel for your account. In other cases you will have to use the same tool or a similar one that is capable of exporting your MySQL database. Detailed information how to perform a MySQL backup you can find in MySQL Tutorial.
Alternatively if you don’t have phpMyAdmin installed but you have shell access you can use mysqldump tool. The syntax is as follow
mysqldump -h HOST -u USER -p DATABASENAME > FILENAME.sql
Where:
HOST is the database server hostname or it can be omitted if you are running the MySQL server locally.
USER - a user with full privileges to the Magento database.
DATABASENAME - is the full name of the database which Magento is running.
FILENAME - can be anything you find suitable for the backup file.
Also if you have Plesk, DirectAdmin or any other web hosting management tool- you can look at the available options. Many panels allow you to dump the database with just a few clicks. For example cPanel does have an option for this.

Magento Google Analytics

Google Analytics is a free Google service which allows the webmasters and web site administrators to monitor their web sites' traffic and conversion ratio.
Magento supports two types of tracking:
Page View Tracking: Lists the origin from which your web store visitors linked to your store.
E-commerce Tracking: Lists the customers that make purchases and what they buy.
First you need to sign up at http://www.google.com/analytics/sign_up.html. You will receive a Google Analytics account number. Write it down since you will need it for the Magento configuration.

How to manage order emails

As I have mentioned in the Magento order options section, Magento has a very nice built-in email functionality called Sales Emails which allows you to manage the emails you send to your customers when an order is processed. Before you configure your emails, you might want to add new email templates. You can do this from the admin area > System > Transactional Emails.
Now let's take a closer look at each of the options in Sales Emails:

Magento Features

Thursday, December 8, 2011
The large array of the Magento features is one of the main benefits of Magento. Through them you can easily develop and manage a successful online store. Magento features like different payment engines and shipping options along with the international support and high security using a private SSL certificate will make your shop an attractive place for e-commerce.

Magento main features include:

Manual Installation of Magento

The steps which you must follow in order to complete the Magento manual installation are:
Step 1: Download the latest stable Magento package from:
http://www.magentocommerce.com/download.

Step 2: Upload the package on your hosting account through your cPanel -> File Manager or using an FTP client.

There are 2 options where you can place the Magento download file:

How to set a custom group of users

You can add a new group from the Magento admin area > Customers > Customer Groups > Add New Customer Group.

Once a customer registers, you can change the group he/she belongs to from the Magento admin area > Customers > Manage Customers. Click on the Edit link next to the customer and change the group from the Account Information > Customer Group. Click Save Customer.

Set the discount from Promotions > Catalog Price Rules > Add New Rule.

How to add a Contact Us form in Magento

Magento includes contact form functionality by default. A link to a contact form can usually be found in the footer of your Magento installation.

Of course, you can add a contact form on any page. All you need to do is:

Log in to the administrator area.
Go to CMS > Pages.

How to set up a blog in Magento

It is not difficult to set up a blog in Magento. However, note that functionality is not included by default and you will have to use a custom extension to add it.

How to redirect Magento to open through www

For SEO and usability purposes you may want to redirect your visitors to open your site only through www (http://www.yourdomain.com).

To do this in Magento, you should open the .htaccess file in the folder where your Magento is installed. In it locate the RewriteEngine on line and right after it add the following lines:

How to speed up Magento

Many Magento issues are caused by slow performance. The recommended way to speed up Magento's performance is to enable its Compilation function. The performance increase is between 25%-50% on page loads.

You can enable Magento Compilation from your Magento admin panel > System > Tools > Compilation.

How to enable Search Engine Friendly URLs in Magento

To enable Search Engine Friendly URLs in Magento, you have to log in to the Magento's administration area and click on the Configuration button. Under the System navigation menu, switch to Web page from the sub-navigation panel on the left.

When the page loads, you will see blue lines which represent closed options tablets. Click on the Search Engines Optimization tab and turn on the Use Web Server Rewrites (mark as Yes). Click on the Save Config button and your Magento SEF URLs will be enabled.

How to reset Magento Admin Password

To change your Magento admin password, go to your cPanel > phpMyAdmin, select your Magento database, click the SQL tab and paste this query:

UPDATE admin_user SET password=CONCAT(MD5('sGnewpass'), ':sG') WHERE username='AdminUsername';


Note: You have to change newpass in the MD5('sGnewpass') with your new password, and change *AdminUsername* to your Magento admin username.

Execute the query by clicking the Go buttong and your password will be changed.

How to configure Magento to work with a new domain

There are two things you should do in order to configure Magento to work with a new domain:

Edit the Magento database
Go to your cPanel > phpMyAdmin. Select your Magento database from the left menu, find the table called core_config_data and click on it.

Click the Browse tab and edit the first two fields:

web/unsecure/base_url
web/secure/base_url


by clicking the pen icon in front of each of them. Replace your old domain name with your new one and click the Go button to save the change.

Clear the Magento cache.
The Magento cache folder is located in your Magento installation directory > /var/cache. To clear the cache, simply delete the folder.

Many Magento issues can be fixed just by deleting the cache.

How to install Magento, an eCommerce Software

Wednesday, September 14, 2011
This tutorial is for users who would like to install Magento, a popular eCommerce software businesses use to help them sell products through their website. However, most eCommerce software is compatible all services and people have the freedom to choose which software they like to use.
Tutorial:

1. Go to http://www.magentocommerce.com/download/noregister and download the “full release” package onto your home computer in any format, but I recommend .zip for most users.

2. Once the download finishes, log in to cPanel at (your domain)/cpanel, such as magento.com/cpanel. After logging in, you may either use a FTP client like Filezilla or File Manager on cPanel.

* If you are using a FTP client, connect to your home directory. The host is typically your domain, the username and password is the same as the cPanel log in, and the port is typically 21. Once connected, locate the magento installation package, named magento-1.2.0.zip or magento-1.2.0.tar.gz, etc. Drag and drop the package into any directory within public_html, but I recommend uploading the package into public_html, which I will explain in a moment.
* If you are using the File Manager provided on cPanel. Simply go to the public_html folder, then select upload, and select the magento package (magento-1.2.0.zip, etc.) to upload it to your folder.

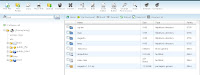
3. Once you upload the magento package, you may use file manager’s extraction tool to extract the files within the package. Go to file manager and select the magento package, then extract it to any folder you want. The extraction tool will typically create a folder called magento, which contains all the installation files.

* If you want magento to start on your home page, you may move all the installation files to public_html, otherwise you will see magento installed at wherever your magento folder was extracted to, such as public_html/magento.

Note: Most of file manager’s tools are located at the top of the page:


4. Now you have all the installation files extracted to your directory. Now Magento requires PHP5 to run, so if you are on our EAGLE or BANANA server, then your default PHP loader is 4, all other servers(APE, LION, HAWK, BAT, etc. will have PHP5 as the default). For those on EAGLE and BANANA, PHP5 is setup on the server, so you may switch to it if you want to. I recommend it because it’s better than PHP4 in my opinion, but also since Magento requires PHP5. To change the loader to PHP5, go to cPanel and scroll down to “Software/Services,” and you should see “PHP Configuration.”

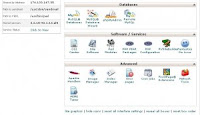
Once you go to “PHP Configuration,” you should see a statement “The “.php” file extension will be processed by” and you select PHP5, then update.


5. Once you change the PHP loader, you need to create a database for Magento. Go to “MySql Databases under the “Database” menu, which is right above the “Software/Services” menu. Then create a new database. You may call the database whatever you want, but call it something such that you will know the database is for Magento. Once you create the database, you should see a database in the form of (username)_(database name you just created).

6. Now open a new browser window and in the address bar, enter (your domain)/(directory where magento folder is located), e.i. magento.arvixedemo.com/magento (there is no need to place public_html in the address because the domain magento.arvixedemo.com will, in a sense, do that for you). It should take you the installation page for Magento. Most of the information provided should already be provided for you. You agree to the terms and conditions, hit next, select your location, hit next. Now if a message that says something like “PHP extension pdo_mysql must be loaded,” then read the next bullet point.

* If you get the message that tells you “pdo_mysql must be loaded,” then do the following. You need to create a file called php.ini which will load certain php settings. Either open up notepad or a text editor on your computer and put the following statements inside:

extension=pdo.so
extension=pdo_mysql.so

* Save the file as php.ini. Then upload the file into your magento directory and subdirectories, app, lib, and media.
* Restart the installation and you should be able to bypass the message.

(The image below is the first page you should see for the Magento Install)


Again most of the fields will be intelligently guessed for you. However, when it asks you to enter you database information, the host normally stays “localhost,” but the database name will be the same one you created in the last step, in the format (username)_(database name). The username and password in most cases will be the same as the cpanel login information. Continue you on to the admin setup page, and create an admin account for Magento. Once you do that, you are all set.
You have just successfully installed Magento. If, however, you feel something is missing in this tutorial that should be pointed out, please comment the blog. I hope this tutorial helped.